
Since late last year Nokia offers a Tizen SDK for its maps service HERE . Unfortunately there currently is no documentation available so you have to experiment a bit in order to use it. If you have developed bada Apps with NAVTEQ maps, you have a slight advantage, because the Tizen HERE SDK builds very heavily on it and probably is a direct descendant of it.Unfortunately the installation already starts with a problem. On my machine (Windows 7 x64) have failed to install the HERE SDK via the installer without destroying my normal Tizen SDK installation. The Nokia HERE Files have been installed, but pretty much everything else from the Tizen SDK was gone. Luckily the HERE SDK is relatively simple, so you can easily extract the files from the zip file yourself and copy it to the appropriate folder of the Tizen SDK.
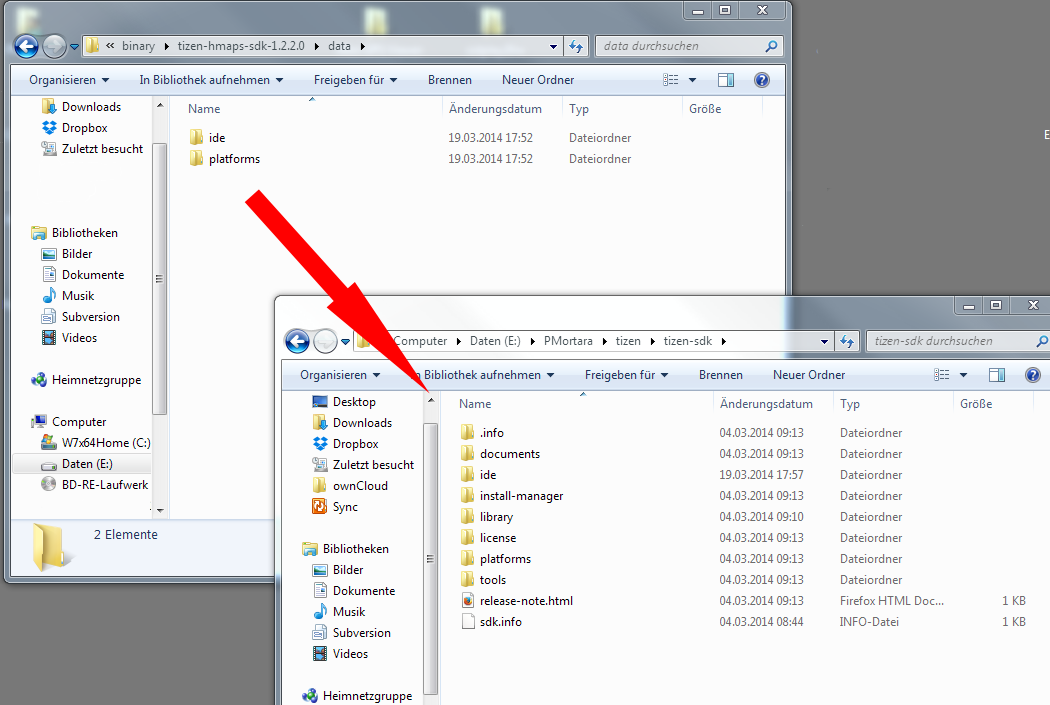
For this purpose first extract the downloaded Zip file and then search within the subfolder ‘binary‘ for the file ‘tizen-SDK-1.2.2.0.zip hmaps. Extract this file also and a folder named data with 2 subfolders ‘ide’ and ‘platforms’ appear. Now copy these two subfolders to the installation directory of your Tizen SDK. There should already be two folders with the same name present. The new features will then be available after you restart your IDE.
To check if the manual installation worked, start the Tizen IDE and create a new Tizen project Native project. The menu 'Samples' should now contain a Nokia HERE Maps Sample Project ‘called MapSample‘ . This project is very helpful to familiarize yourself with the basic mechanisms of the SDK, so import it to your workspace.
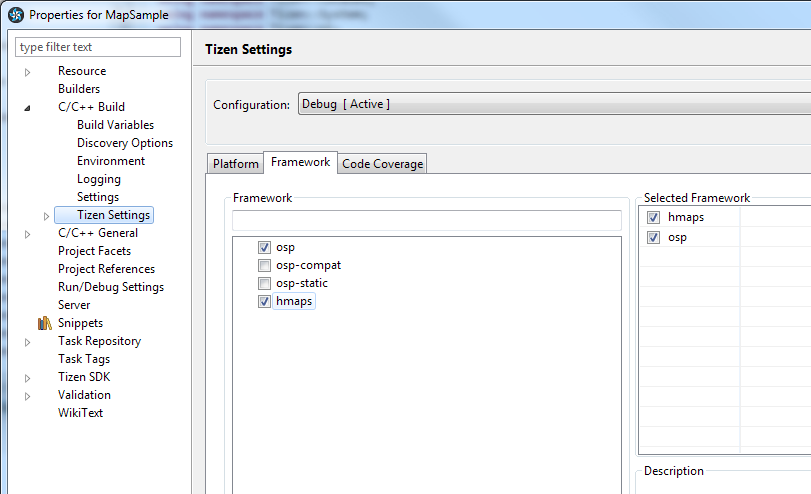
To build the sample app you need something to add to the project properties. Usually such settings should be automatically taken, but in the current version of the SDK, this is not the case. Click with the right mouse button on the example project in your Project Explorer and select the point ‘Properties‘ . There you will find ‘C/C Build‘ . Expand it and click on the sub-item ‘Tizen Settings'. There again switch to the ‘Framework‘ tab and activate the check boxes ‘called hmaps‘ for each of your build configurations.
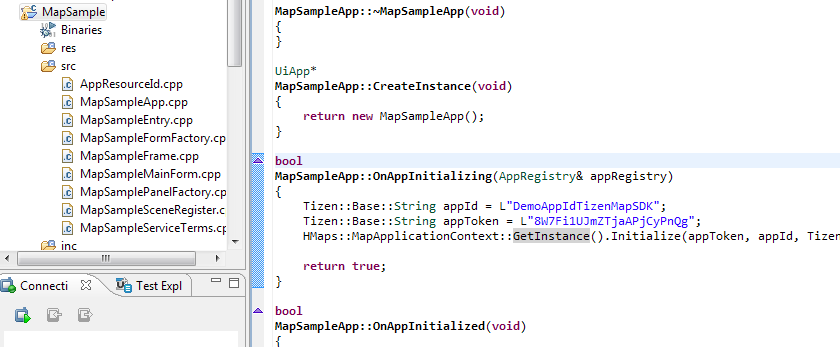
When you're done with the sample app and continue with your own app you will need to register on the Nokia Developer Site and create an API key consisting of AppId and AppToken . These have to be stored in your app, how to do that you'll best see back in the above Sample project again. There in the file ‘MapSampleApp.cpp‘ in lines 51 to 53 the ID and Toklen has to be deposited.
If you have any questions or problems simply post them here in the forum and I'll try to help you.


